Facebook conversion API
API Conversions is a tool that allows you to transmit key web and offline events or customer actions from your server directly to Facebook’s server.
API Conversions will be useful for you:
- When working with offers where pixel code cannot be used (e.g., Trial, SS offers);
- In the case of working with cash delivery offers, to optimize a deeper stage of the funnel (e.g., optimization for confirmed leads);
- If you work with GEOs like the Philippines and Indonesia, due to the large number of leads, you may not reach the target audience. Thanks to detailed optimization with the Conversion API, the final ROI will be higher.
- By using the “Lead id” parameter, you can optimize for leads from lead forms.
To use the Conversions API, you should:
1. Log in to your account on the aff1.com website.
2. Tools → Flows → Create Flow (if you already have one, click “Edit”).

3. A window for editing your flow will open, find “Postback” and click on it → Create Postback.

4. Select Type → “Facebook Conversion API“.
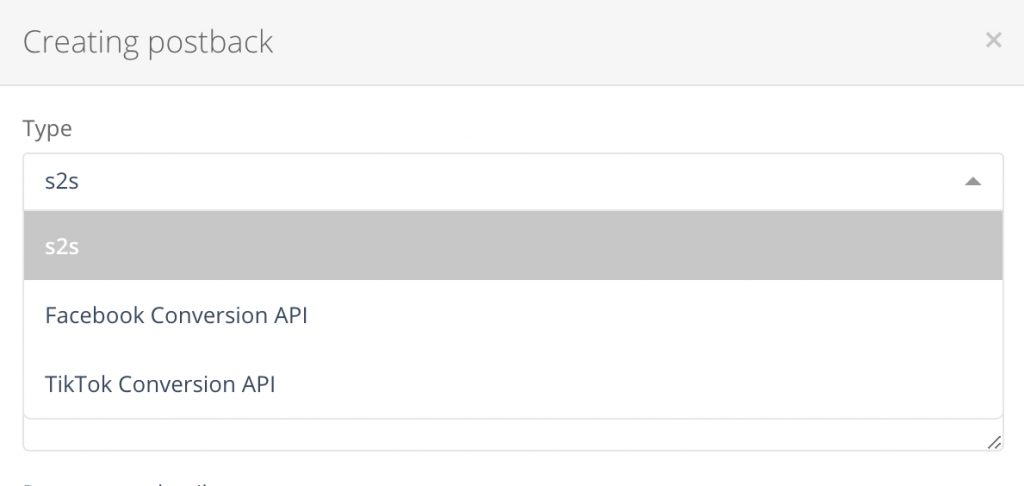
5. Next, fields will appear that need to be filled in for the proper functioning of the Conversion API.
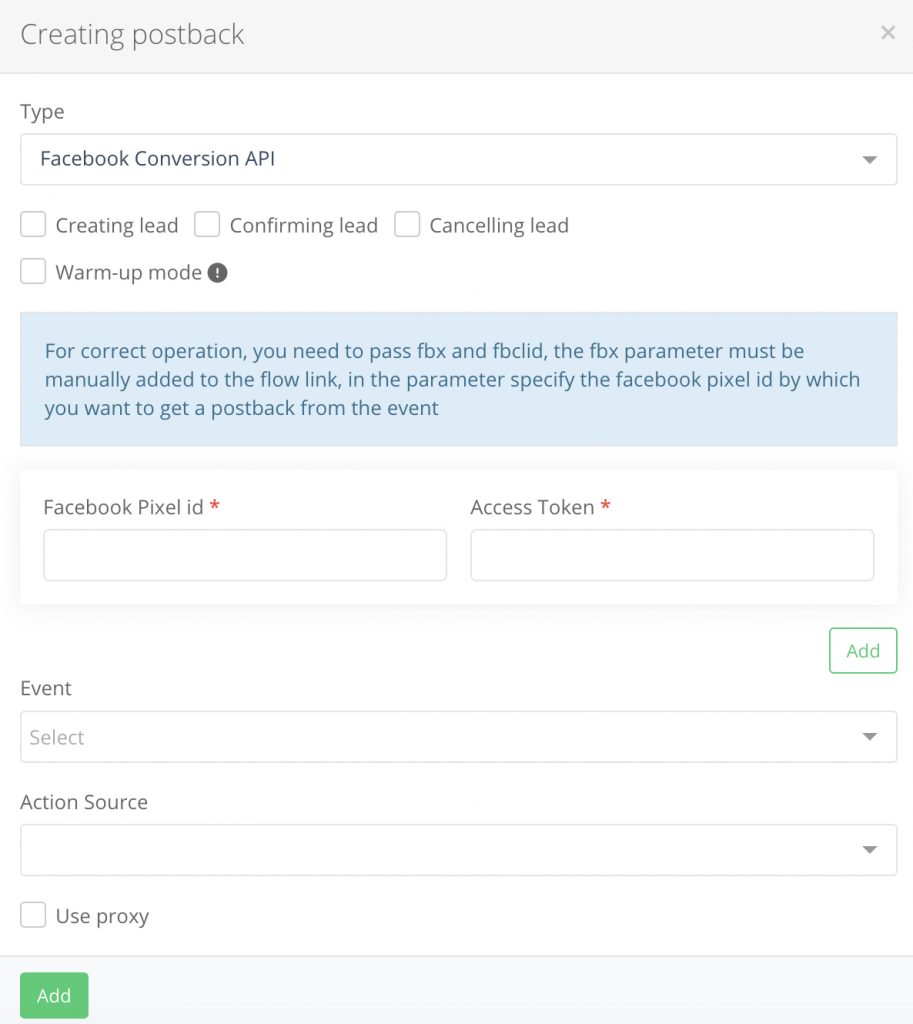
5.1. First, select the “Type” — the action for which you will receive postback analytics: Lead Generation, Lead Confirmation, Lead Cancellation. You can select one or multiple parameters.
5.2. The next field is “Facebook Pixel ID” — for this, you need to create a Facebook pixel and copy its ID from your ad account.
5.3. Next is the “Access Token” field — you can simply obtain the token ID:
- Through Event Manager. Open your Event Manager, go to settings, and generate an access token.
- Through the page code of Ads Manager. Open your Ads Manager, right-click, select “View Page Source,” search for “access_token:” without quotes, and obtain the token.
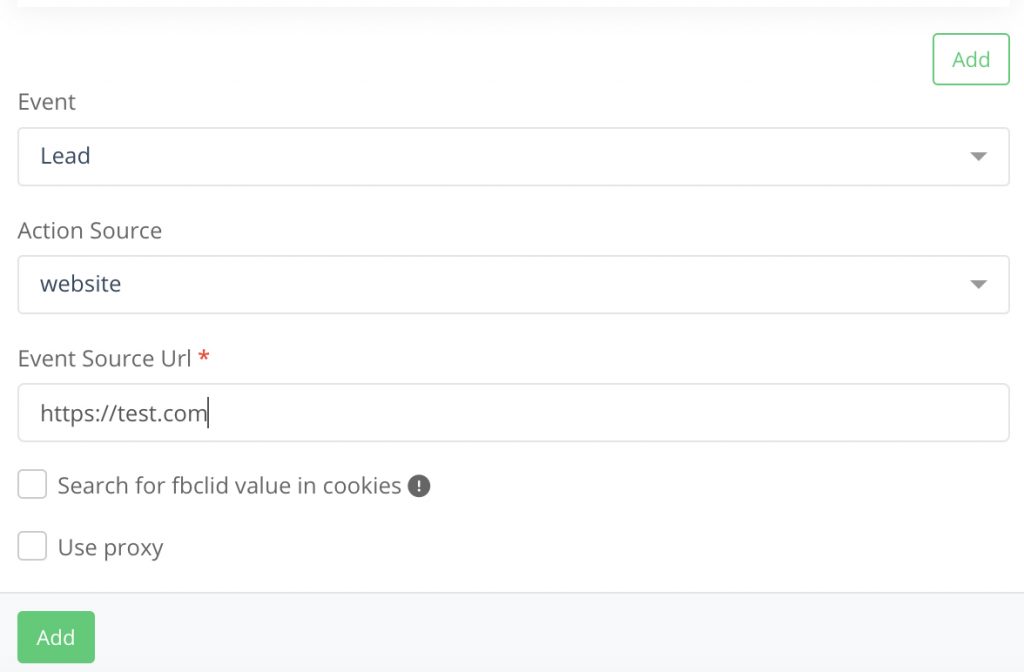
5.4. In the “Event” field, you can enter any word that will be displayed in your Facebook statistics, for example, “Lead” or “Purchase.”
5.5. The last field is “Action Source” — here you must specify the resource where the conversion took place. It could be a website or, for example, an app. When selecting “Action Source” → website, the option “Search fbclid value in cookies” is activated. As an additional parameter, there is the “Enable proxy connection” option.
It is also important to note that when selecting “Event” → Purchase, an additional window will open with the selection of Custom data and fields:
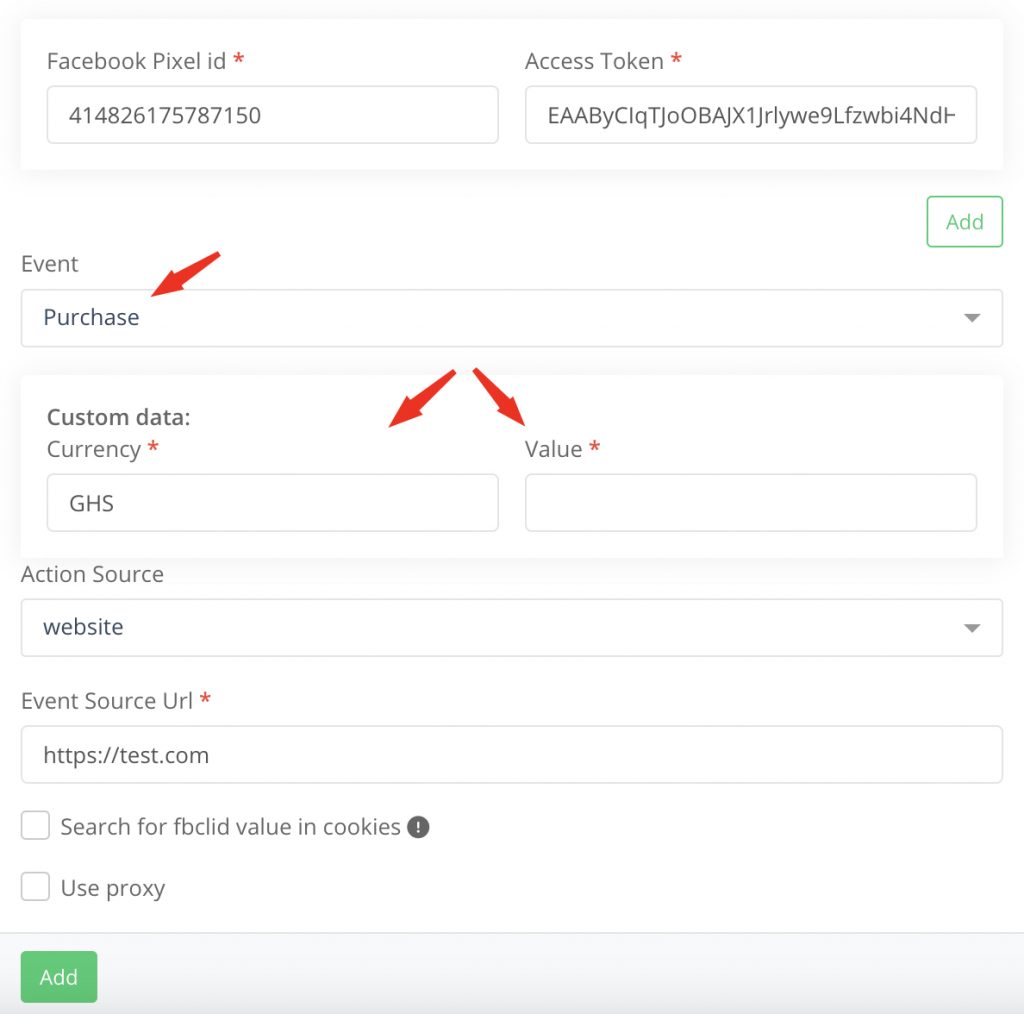
- Currency — here, specify the currency of the selected geo (in our example, it is Ghana, so enter “GHS”).
- Value — here, pass the event from initiate checkout in the Facebook settings (read more here).
6. Next, you should go to the offer card for which you created the flow and click the API button, after which a settings window will appear.
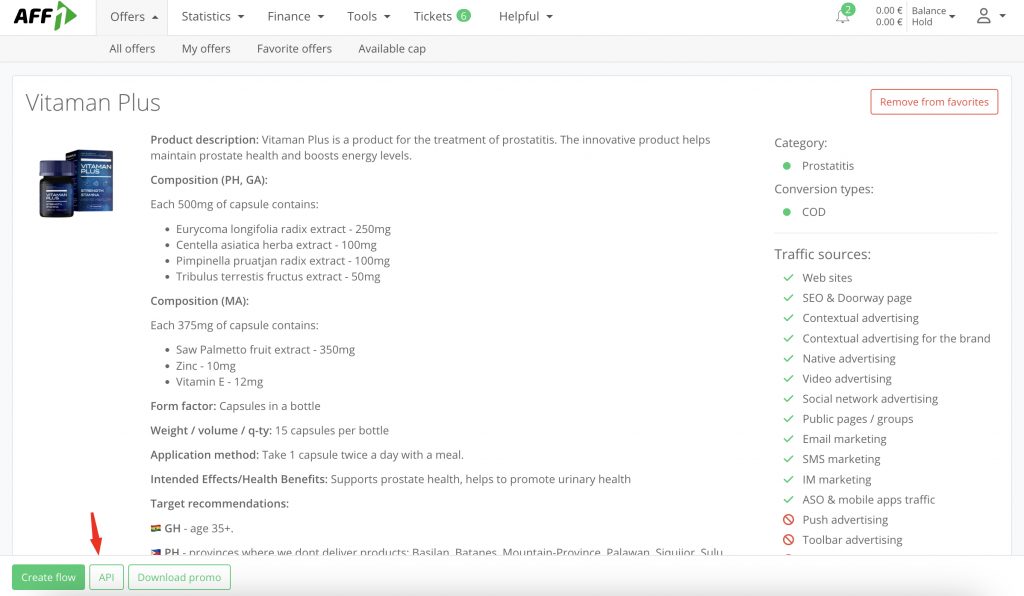
7. In the new window, you will see a block with various settings. Start with the main one — “Type,” which is the selection of the archive for the tracker. By default, it is set to PHP (if you are using Keitaro, select it).

- Select “Link to Flow,” and choose the flow you created earlier. This is done because postbacks for FB Conversion API can only be configured within a flow; it cannot be set up in a global postback.
- Our recommendation: Always choose the “Order Logging” option. This will help you recover leads in case they are lost.

10. Next, select all the options for the correct transmission of leads → Pass: fbclid, fbpx, subid, data parameters (as needed). In the Custom HTML code, add the Facebook Pixel code (see instructions).

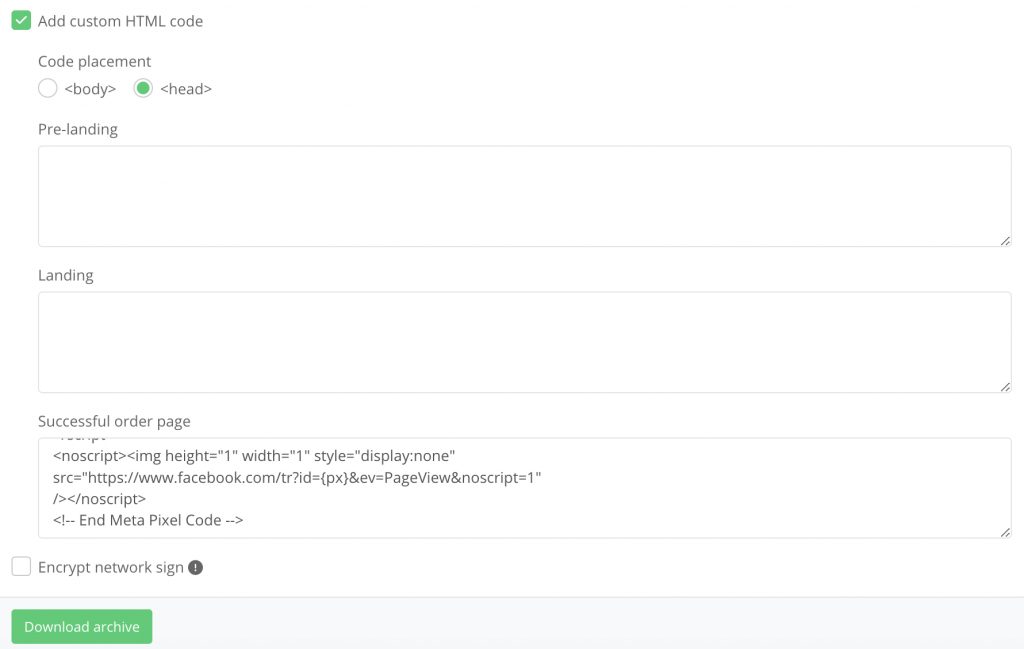
- Click the “Download Archive” button, then upload the file to your Keitaro (see instructions).
- An important point: in Keitaro, you need to go to Campaigns → find the already configured campaign → Tracking → Campaign URL → copy the link (example shown in the screenshot).

It is important to remove fbclid={fbclid} from the link because otherwise, the entire integration will not function correctly.
Additional Features:
- Ability to track the status of event submission to Facebook (sent / error).
Path: Tools → Postback Logs.

- Ability to verify the correctness of the entered data. This means ensuring that the data entered in the fields (Access Token, Facebook Pixel ID) is correct and that events will be properly sent after filling them in. To do this, you must enter all the data, save it, and then go to the “Testing” modal window.

- Next, enter the test server, which is available in Facebook’s account.

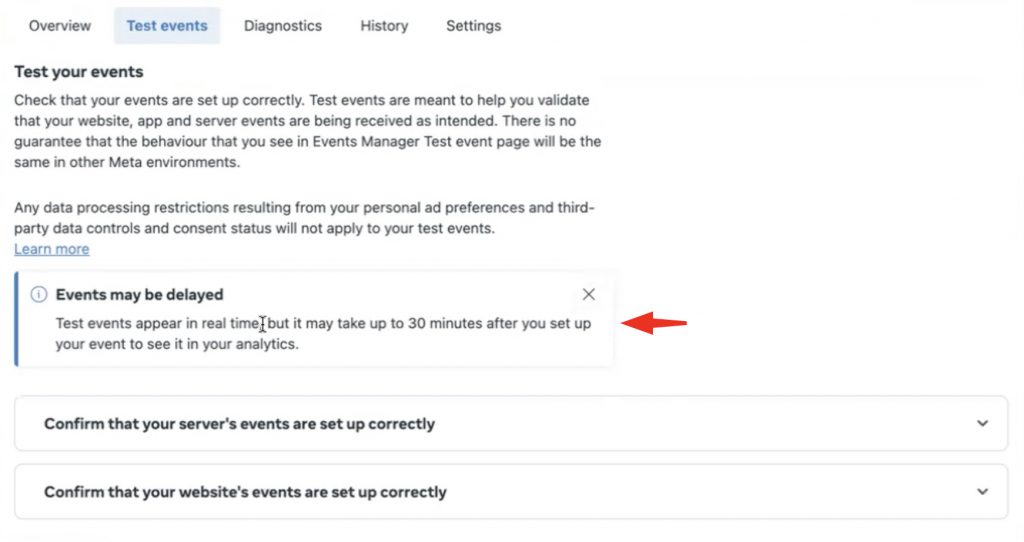
- Test data can be obtained from Facebook Ads → Data Sources → Test Events.
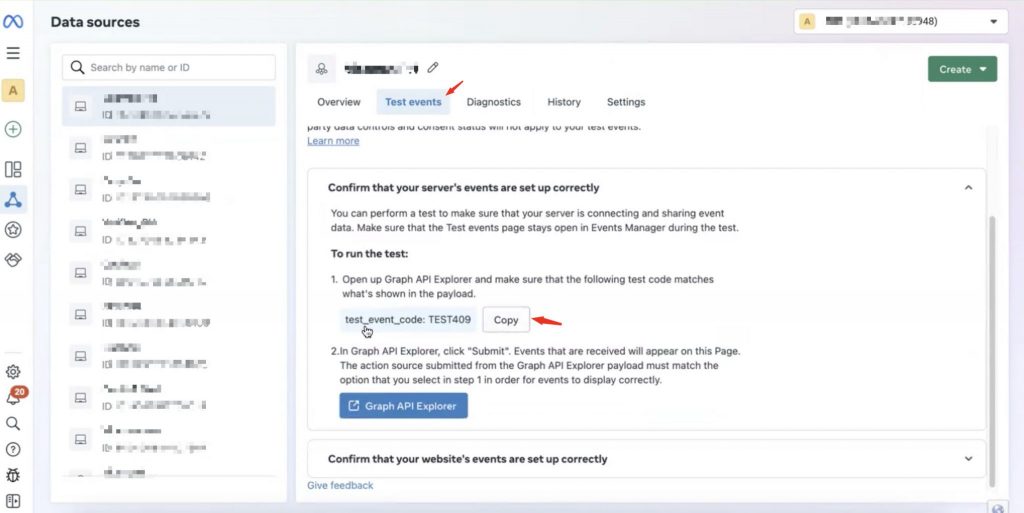
Paste the copied test values and click the “Check” button. If the data is entered correctly, the result will be “OK”.


If the data is entered incorrectly (Pixel, Access Token), an error will occur.


Note! There may be delays on Facebook itself, as shown in the example, so wait for the correct display.
