


To send traffic to an AFF1 offer you need a flow — your personal link to the offer with the pre-landing and landing you chose. This guide walks you from choosing an offer to the link you paste into an ad account or a tracker.
Find an offer
- Open Offers → All offers.
- Narrow the list with the filters on the left: the vertical tabs (All verticals, Nutra, White Hat), Regions, Countries, Sources (traffic sources allowed for the offer) and Targeted action. Tick Favorite offers to see only the offers you starred. Click Apply.
- Use the search field above the filters to find an offer by name.
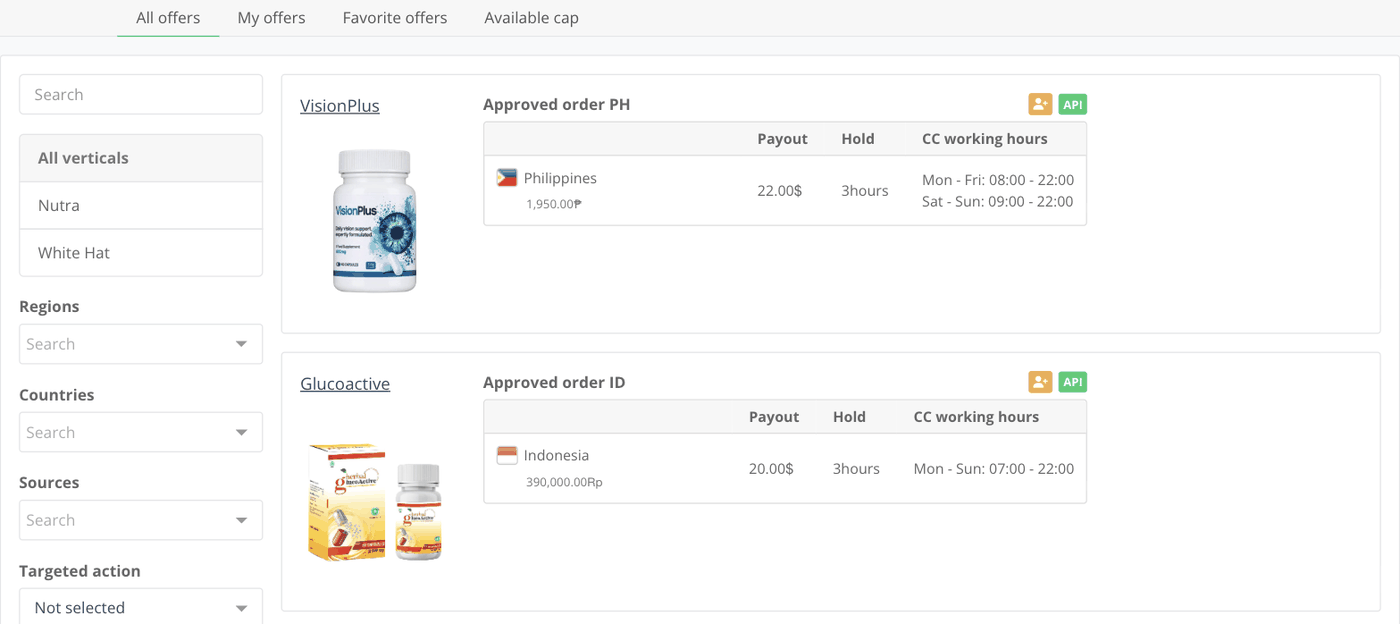
Each card shows the goal you are paid for (for example, Approved order PH) and, for every country, the payout, hold and call-centre working hours. Two icons may appear next to the goal:
- the orange icon — the offer is available Upon the request, you need to request access first;
- API — the offer accepts leads through the API (see API integration: manual mode).
The My offers tab lists the offers you already have access to.
Check the offer page
Click the offer name and read the page before you launch:
- the description, targeting recommendations and contraindications;
- Rules — forbidden approaches for this offer. Breaking them can cost you the payout;
- the goal table: Payout, Landing price (the price the customer sees), Hold and CC working hours. If the offer has several goals, switch between them in the drop-down above the table;
- Category, Conversion types (for example, COD — cash on delivery) and Traffic sources: a green tick means the source is allowed, a red sign means it is forbidden;
- Pre-landings and Landings — click a name to preview the page.

The buttons at the bottom of the page are Create flow, API and Download promo. If you have no access to the offer yet, you see Request access instead, and the other buttons are inactive.
Request access to a private offer
- On the offer page, click Request access.
- The Creating ticket form opens with the title already filled in (Opening target access “Offer / goal”).
- In Message, tell the manager about your experience with this or similar offers, your traffic source and planned budget. Links to statistics from other networks help to get approved faster.
- Click Create.

The request appears in Tickets, and the manager answers there. Once access is granted, the offer appears in Offers → My offers.
Create a flow
- On the offer page, select a pre-landing in the Pre-landings list, or W/o pre-landing to send visitors straight to the landing.
- Select a landing in the Landings list.
- Click Create flow at the bottom of the page.
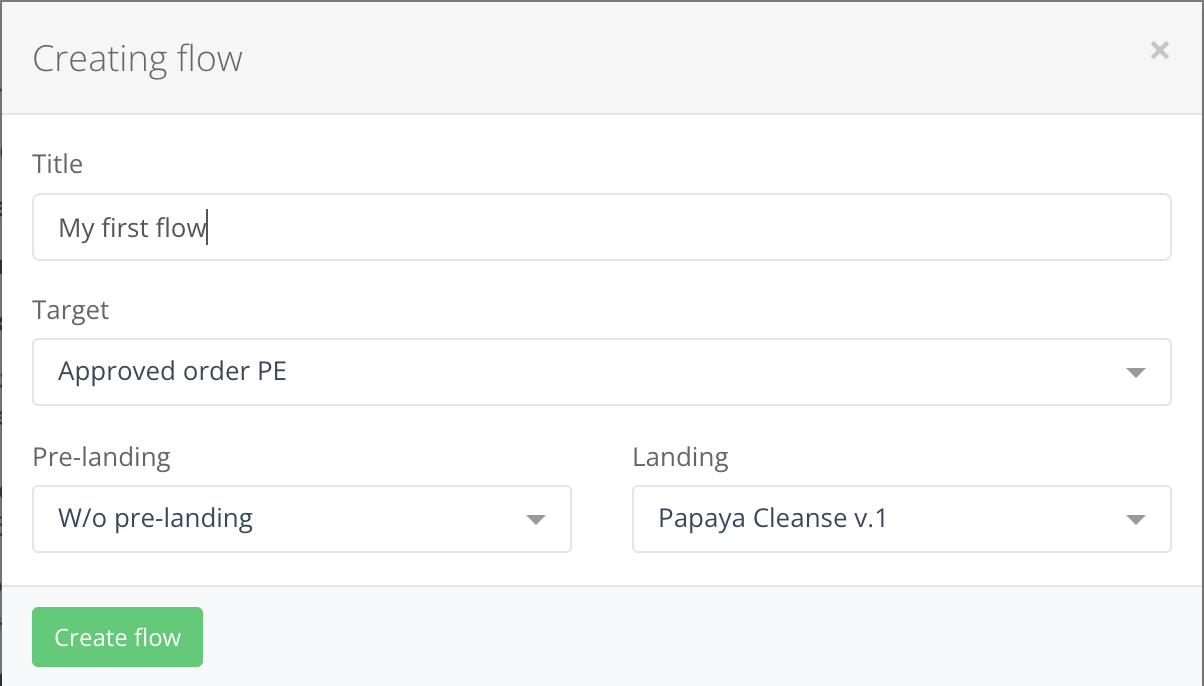
- In the Creating flow window, enter a Title (only you see it), check the Target, Pre-landing and Landing, and click Create flow.
Get the traffic link
Right after you create a flow, the Flow created window opens. The flow is created in simplified mode and its link is ready to use:
- Choose domain for traffic — an AFF1 domain or your own parked domain (see Domain parking).
- Use clickid for external tracker integration — tick it if you use a tracker and enter your tracker’s click ID macro, for example
{subid}for Keitaro or{clickid}for Binom. AFF1 returns this value in postbacks through the{clickid}token. - Use data parameters — up to four parameters,
data1–data4, for your own breakdowns in AFF1 statistics: campaign, ad set, creative, placement. - Copy the Traffic link.

The link looks like this:
http://your-domain.com/?flow_hash=AbCd1234&clickid={subid}&data1={campaign_id}You can get the link again at any time: Tools → Flows → ••• next to the flow → Get link, or the Get link button at the bottom of the flow profile.
Fine-tune the flow
Open the flow profile (the Flow profile link in the window, or Tools → Flows → flow name) when you need more than the basic link:
- change pre-landings and landings; tick several landings to split traffic between them;
- Advanced settings under the landings list: Bind landing to user session keeps the same landing for a returning visitor, Hide list of countries detects the visitor’s country by IP and hides the country selector in the order form;
- Advanced settings section: flow group and traffic back;
- Postback — send leads and statuses to your tracker or to Facebook (see Postback and Facebook Conversions API);
- External systems analytics and codes — pixels and counters (see Analytics and external codes).
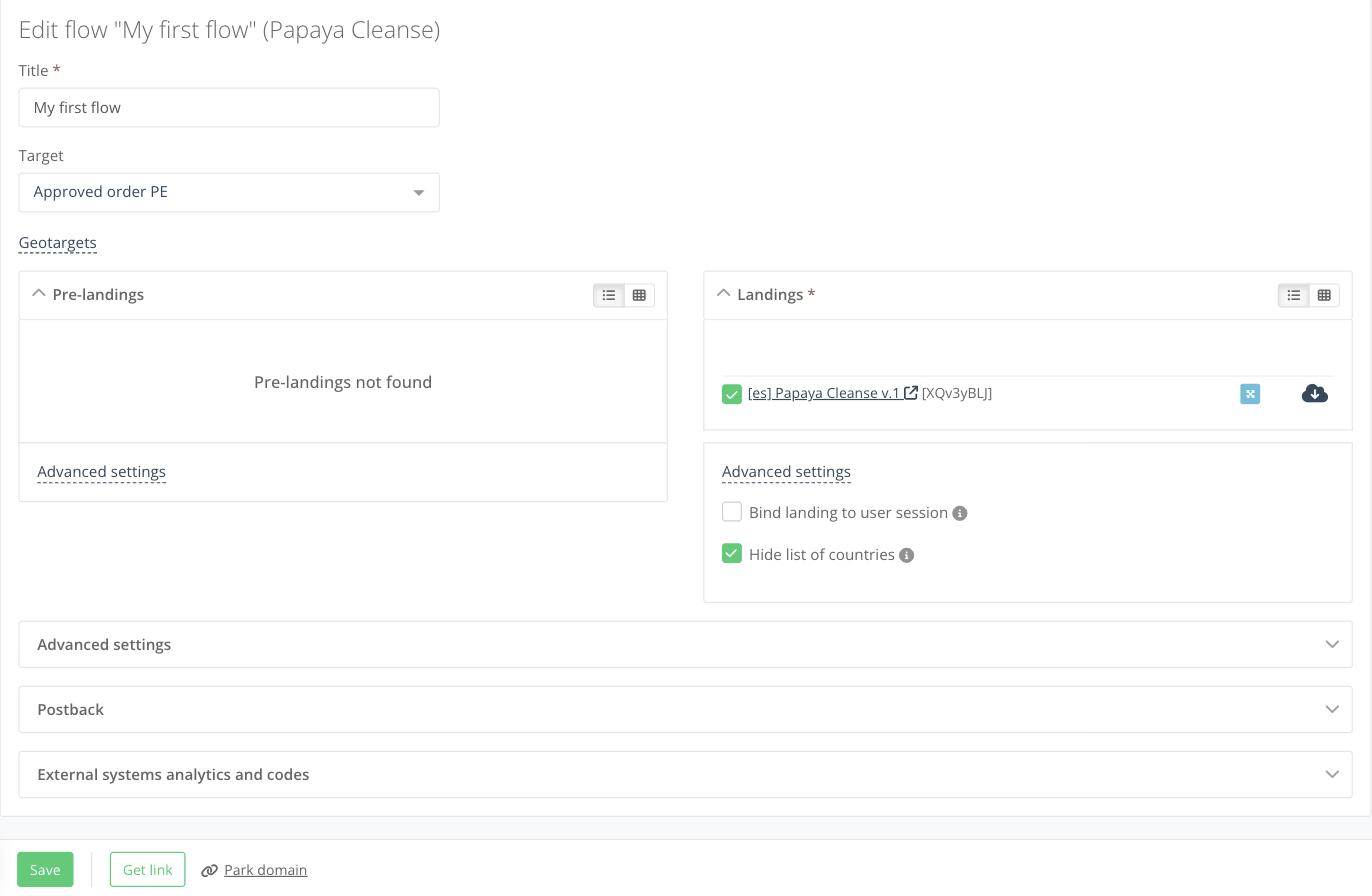
Click Save at the bottom after changing the flow settings.
To remove a flow you no longer need, open Tools → Flows, click ••• next to it and choose Hide. The Clone item in the same menu creates a copy with the same settings.