Facebook Pixel setup
To set up your Facebook Pixel you need to do the following:
1) Activate the option “Forward data parameters.” It is necessary to specify in the fields with Data parameters those parameters that should be passed from page to page in the url. That is, if you specify parameters here, then this parameter will be transferred from the pre-lander to the landing page and to the successful order page. If you do not specify this parameter, then it will not be transferred to other pages. The parameters may vary. You can specify from 1 to 4 parameters.
For example, we prescribe the desired parameter “px.” Further, the URL in Keitaro will be in the following format: http://tracker.testdomen.com/5ttnII?px=276450677661183 (we write your pixel).
Example. If more than one parameter is specified http://tracker.testdomen.com/5ttnII?px=276450677661183&px2=22222&px3=33333&px4=44444
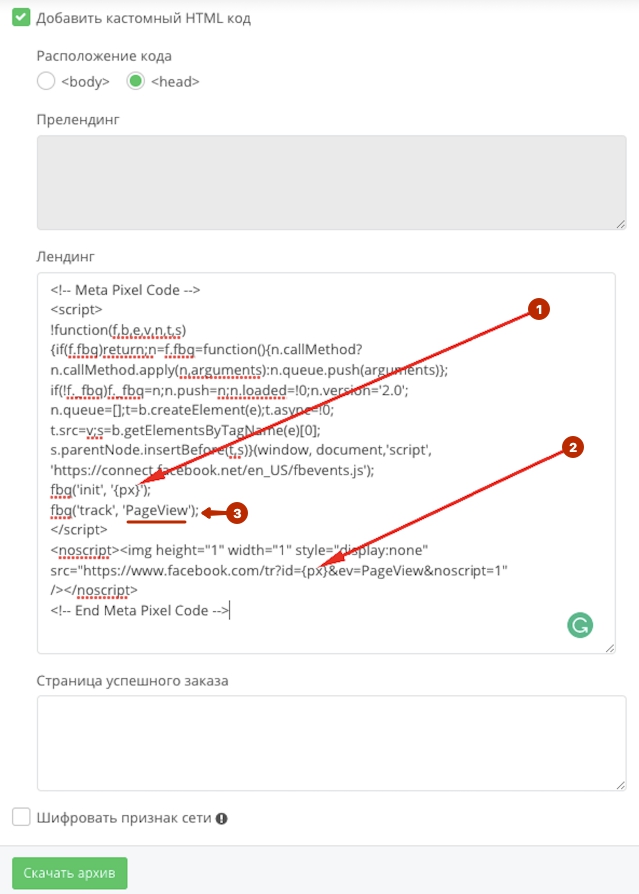
2) In the custom HTML code (on the desired page), you need to add the pixel code from Facebook. Required in the <head> section:
3) After placing the pixel code on the pages of interest in the head block, you need to replace the Pixel_id with the macro {px} as in the example below

As a result, passing the px parapet in the url, this value will be passed to the pixel script.